


I love all things customizable, especially when it comes to jewelry. In this DIY, I’ll teach ya how to make your very own GLORY-fied (bad pun, sorry!) charm necklace, using some pretty motifs from October’s theme. You can most definitely go with your own designs, but if you need a bit of inspiration, you can download a printable template for the drawings I used right here.
What you’ll need:
- Permanent markers, in a variety of colors
- Shrinky-Dinks paper. I recommend using the clear kind so that the charms have a translucent look, but white works well, too!
- Scissors
- A hole puncher
- Parchment paper
- A baking sheet
- An oven
- A glass baking dish (to flatten the charms when they come out of the oven)
- Pliers and/or wire cutters
- A jewelry chain, jump rings, and a jewelry clasp. You can buy these items pretty cheaply from a craft store, or you could reuse an old necklace or bracelet chain.
- A paint brush
- Mod Podge (The gloss kind works best!)
How to do it:
Step One

Using permanent markers, draw the designs for your charms on a sheet of Shrinky-Dinks paper. I traced mine from drawings I’d already made. You can sketch your own, or use the template I linked to above. If you have clear paper, make the outlines on one side, and color the shapes in on the other side to get a pretty, three-dimensional effect! And if you’re drawing your own designs, rather than using the template, here are a couple more tips: Each shape should be about three times the size you want your final charm to be, and any long, skinny shapes can curl up and stick together when heated, so the shorter and wider the shapes, the better!
Step Two

Here are my charms, all drawn out and colored in. (I ended up tossing the laurels because of what I just mentioned about long, skinny shapes curling in the oven. I learned that lesson with these laurels—oh well!) When yours are finished, too, cut out each design. Near each shape’s edge—but not too close to the edge—punch a hole. (On the template, the placement of the hole is marked with an X.) THIS IS A VERY IMPORTANT STEP! If you don’t punch a hole before you bake your charms, you won’t be able to put the charms on the necklace later. I almost forgot to punch holes into my charms before I cooked ’em. FOR THE LOVE OF ALL THINGS CUTE AND HOLY, DOUBLE CHEEEECK!
Step Three

Cover the baking sheet in parchment paper, which will keep the charms from sticking to the pan. Place two or three charms on the sheet, colored-in sides facing UP.
Step Four
Bake according to the Shrinky-Dinks instructions, for about one to three minutes, or until the shapes shrink and flatten out completely. If you notice a charm curling up, don’t worry! The charm will most likely flatten out when it cools. If it doesn’t, you’ll probably need to try a bigger shape instead.
Step Five

As soon as the charms come out of the oven, place the baking dish or another flat glass object over them while they’re still in the pan. This will help smooth out any curls or bumps.
Step Six
Wait for the charms to cool, which should take about five minutes, then repeat Steps Three through Five until all of your charms are shrunken. While charms are baking or cooling, measure the length of your necklace (or bracelet!) chain. Using pliers or wire cutters, cut the chain at your intended length. Mine was 20 inches long.
Step Seven
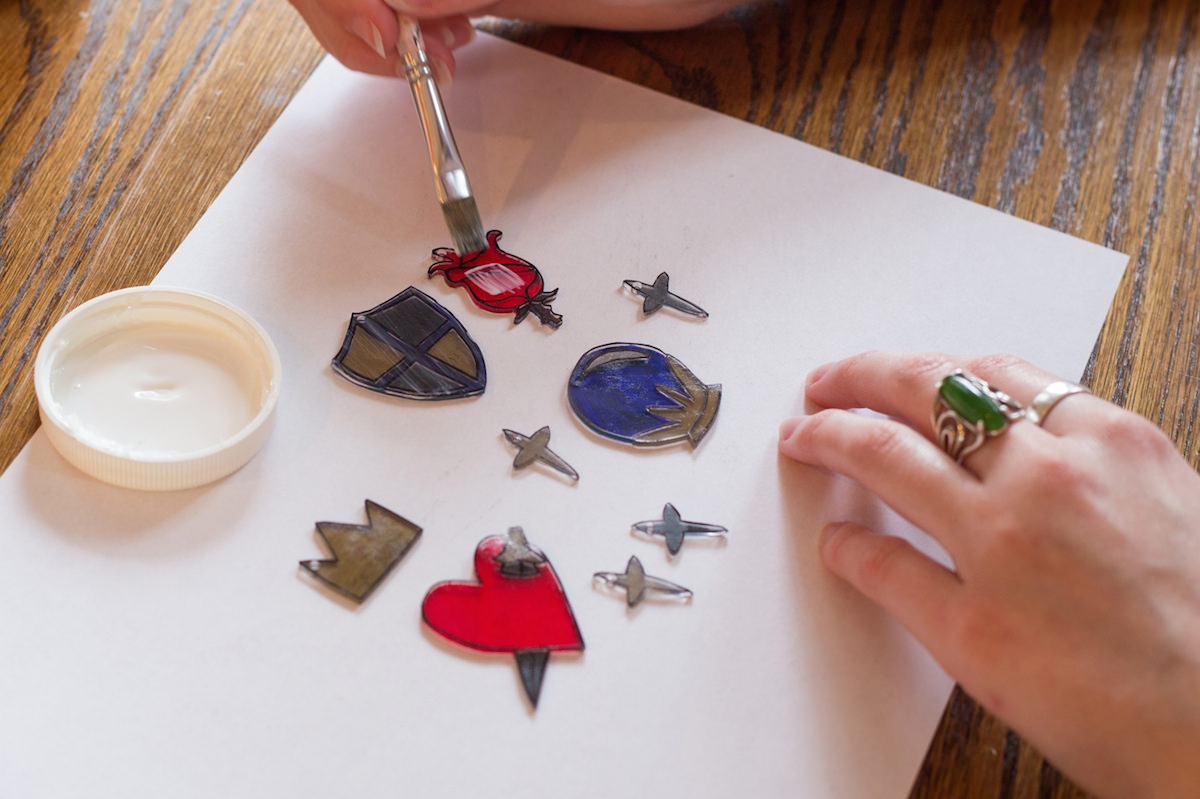
Once all your charms are cooled, paint each of them on both sides with Mod Podge. This keeps the colors from rubbing off on your clothes, or anything else they may come into contact with. I did two coats per side, just to be sure I didn’t miss any spots.
Step Eight
Count your charms, then set aside that number of jump rings, plus two extra jump rings. Pry open one jump ring using either your fingernails or a pair of pliers, slide it through the jewelry clasp’s ring, and secure the jump ring/clasp combo to one end of the chain. Bend open another jump ring and secure it to the other end of the chain. Make sure the jump rings are closed completely so they won’t fall off!
Step Nine
By now, the Mod Podge on your charms should be dry. When they are, you can put them on their own jump rings, and then attach them to the chain. I always start placing charms from the middle of the chain, and then I work my way out toward either side. After affixing my first charm in the middle of the necklace, I kept about one and a half inches between each of my charms.
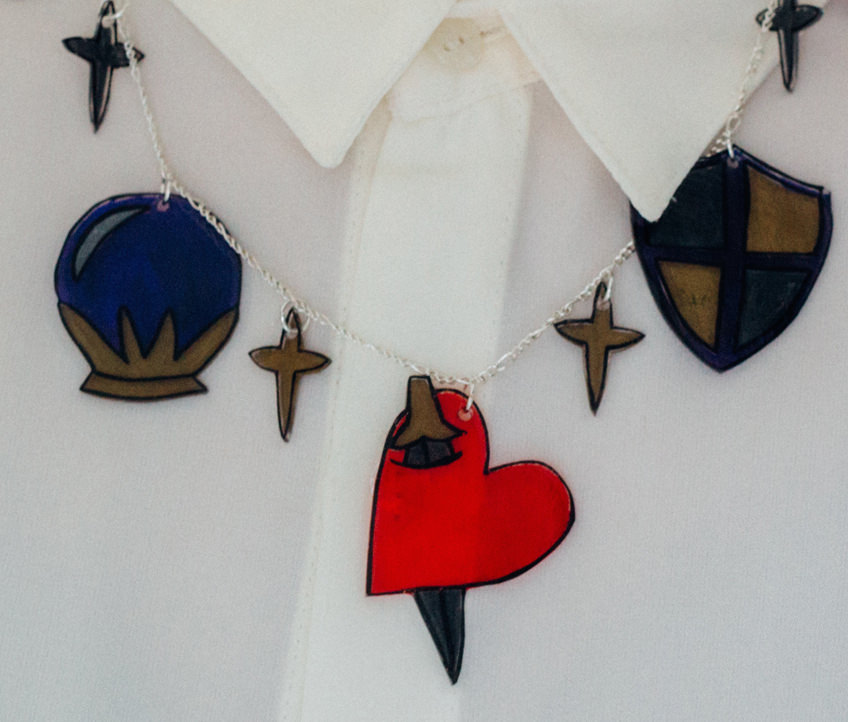
Voilà! Wear your new charms with pride! ♦