


Charming, yes?
During my first semester of college a few months ago, I learned that huge, goofy earrings are not only a ton of fun to wear, but they’re also among the absolute best ways to start conversations and make friends. Oh, you like the glittery dinosaurs hanging from my ears? Cool! Let’s talk about it. Then BOOM! New friend! Pair that with the earrings’ ability to make a person look like Ms. Frizzle on the daily, and you’ve got the best accessory ever. Today I’m going to show you how to turn almost anything (within reason, of course!) into a pair of statement earrings.
What you’ll need:

- THINGS! Tchotchkes, small toys, wooden shapes—whatever strikes your fancy! Places like party stores or the dollar store are great for small, fun things on the cheap.
- Tools for poking holes, including a needle and thread, a lighter, and/or a drill
- A cutting mat or protective surface
- Pliers
- Jump rings
- Earring hooks
How to turn plastic stuff into earrings:
Step One
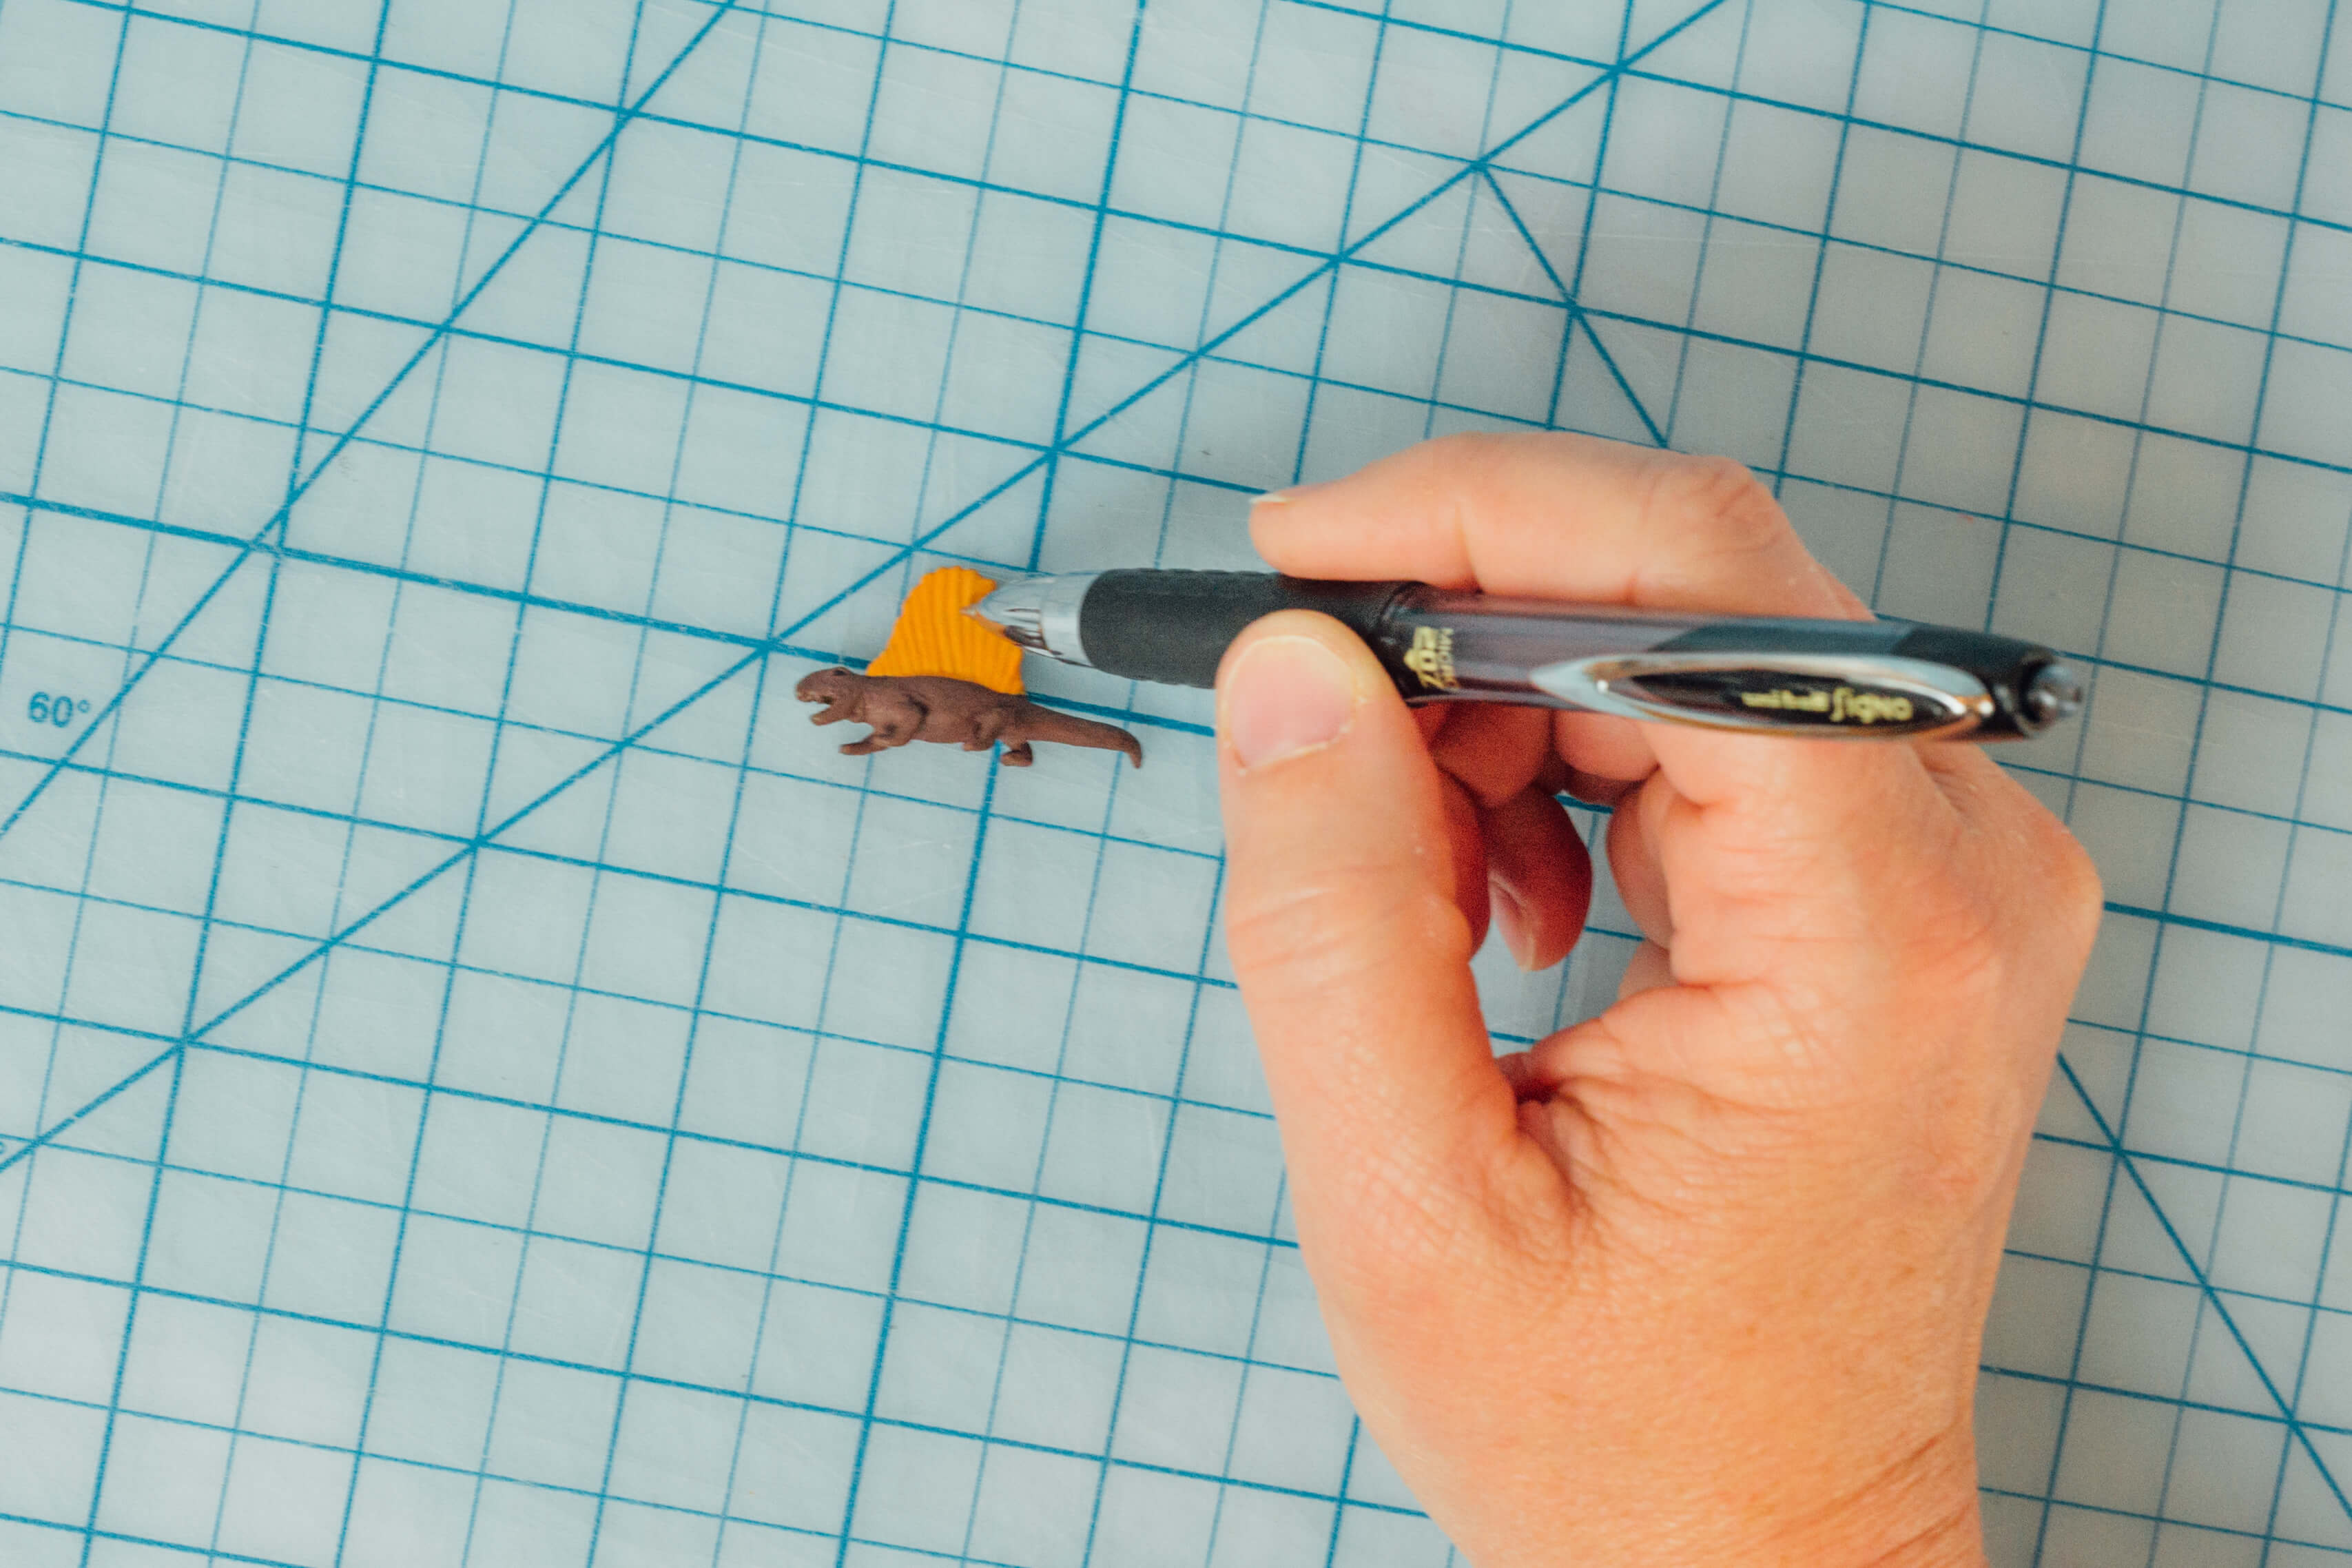
Center your object on the cutting mat and mark where you want the hole to be.
Step Two

When poking a hole in a plastic or rubber object, your best bet is to use a hot needle. So next, grip a needle in your pliers. The needle should be perpendicular to the pliers. Hold a lighter underneath the needle for a few seconds, and then poke the needle through the marked spot on the object. (Be careful not to burn your fingers!) This may take a couple tries, depending on the thickness of your object, but is much easier than trying to poke the hole without heat.
Step Three
Open up a jump ring, stick it through the hole, slip an earring hook onto the jump ring, and close it. I stuck three tiny dinos on mine, attaching them to each other with jump rings and the same hole-poking method.
Repeat Steps One through Three for your second earring…

And ta-da!
How to turn wood stuff into earrings:
Step One

Now we’re going to use a drill. This technique works best for wooden objects, like those little wooden shapes you can buy from craft stores. To start, some caveats: Drills are powerful, and you should be careful when marking a spot for the earring hole. If it’s too close to the edge, the wood could crack and leave you earring-less! So be careful. You’ll also need a pretty small drill bit—I almost always use a 1/16 bit for jewelry.
You also don’t want the object to move around while you’re drilling, and you definitely don’t want to drill through the table! Mark with a pencil where you want the hole to be and clamp the object so that it hangs over the edge of a table.
Step Two

Place the drill bit onto the marked spot, and slowly begin to drill, making sure to hold steady and to not drill through the table! Once you reach the bottom of the object, you can flip it over and repeat on the other side to make a cleaner hole. Don’t underestimate help here, either! I almost always enlist one of my parents to help me drill things, especially when I’ve never tried it on the material before. Clamp and drill one more time for your second earring!
I added some acrylic paint and glitter to my stars to finish them off:

Cute, right?
How to turn fabric stuff into earrings:
Step One
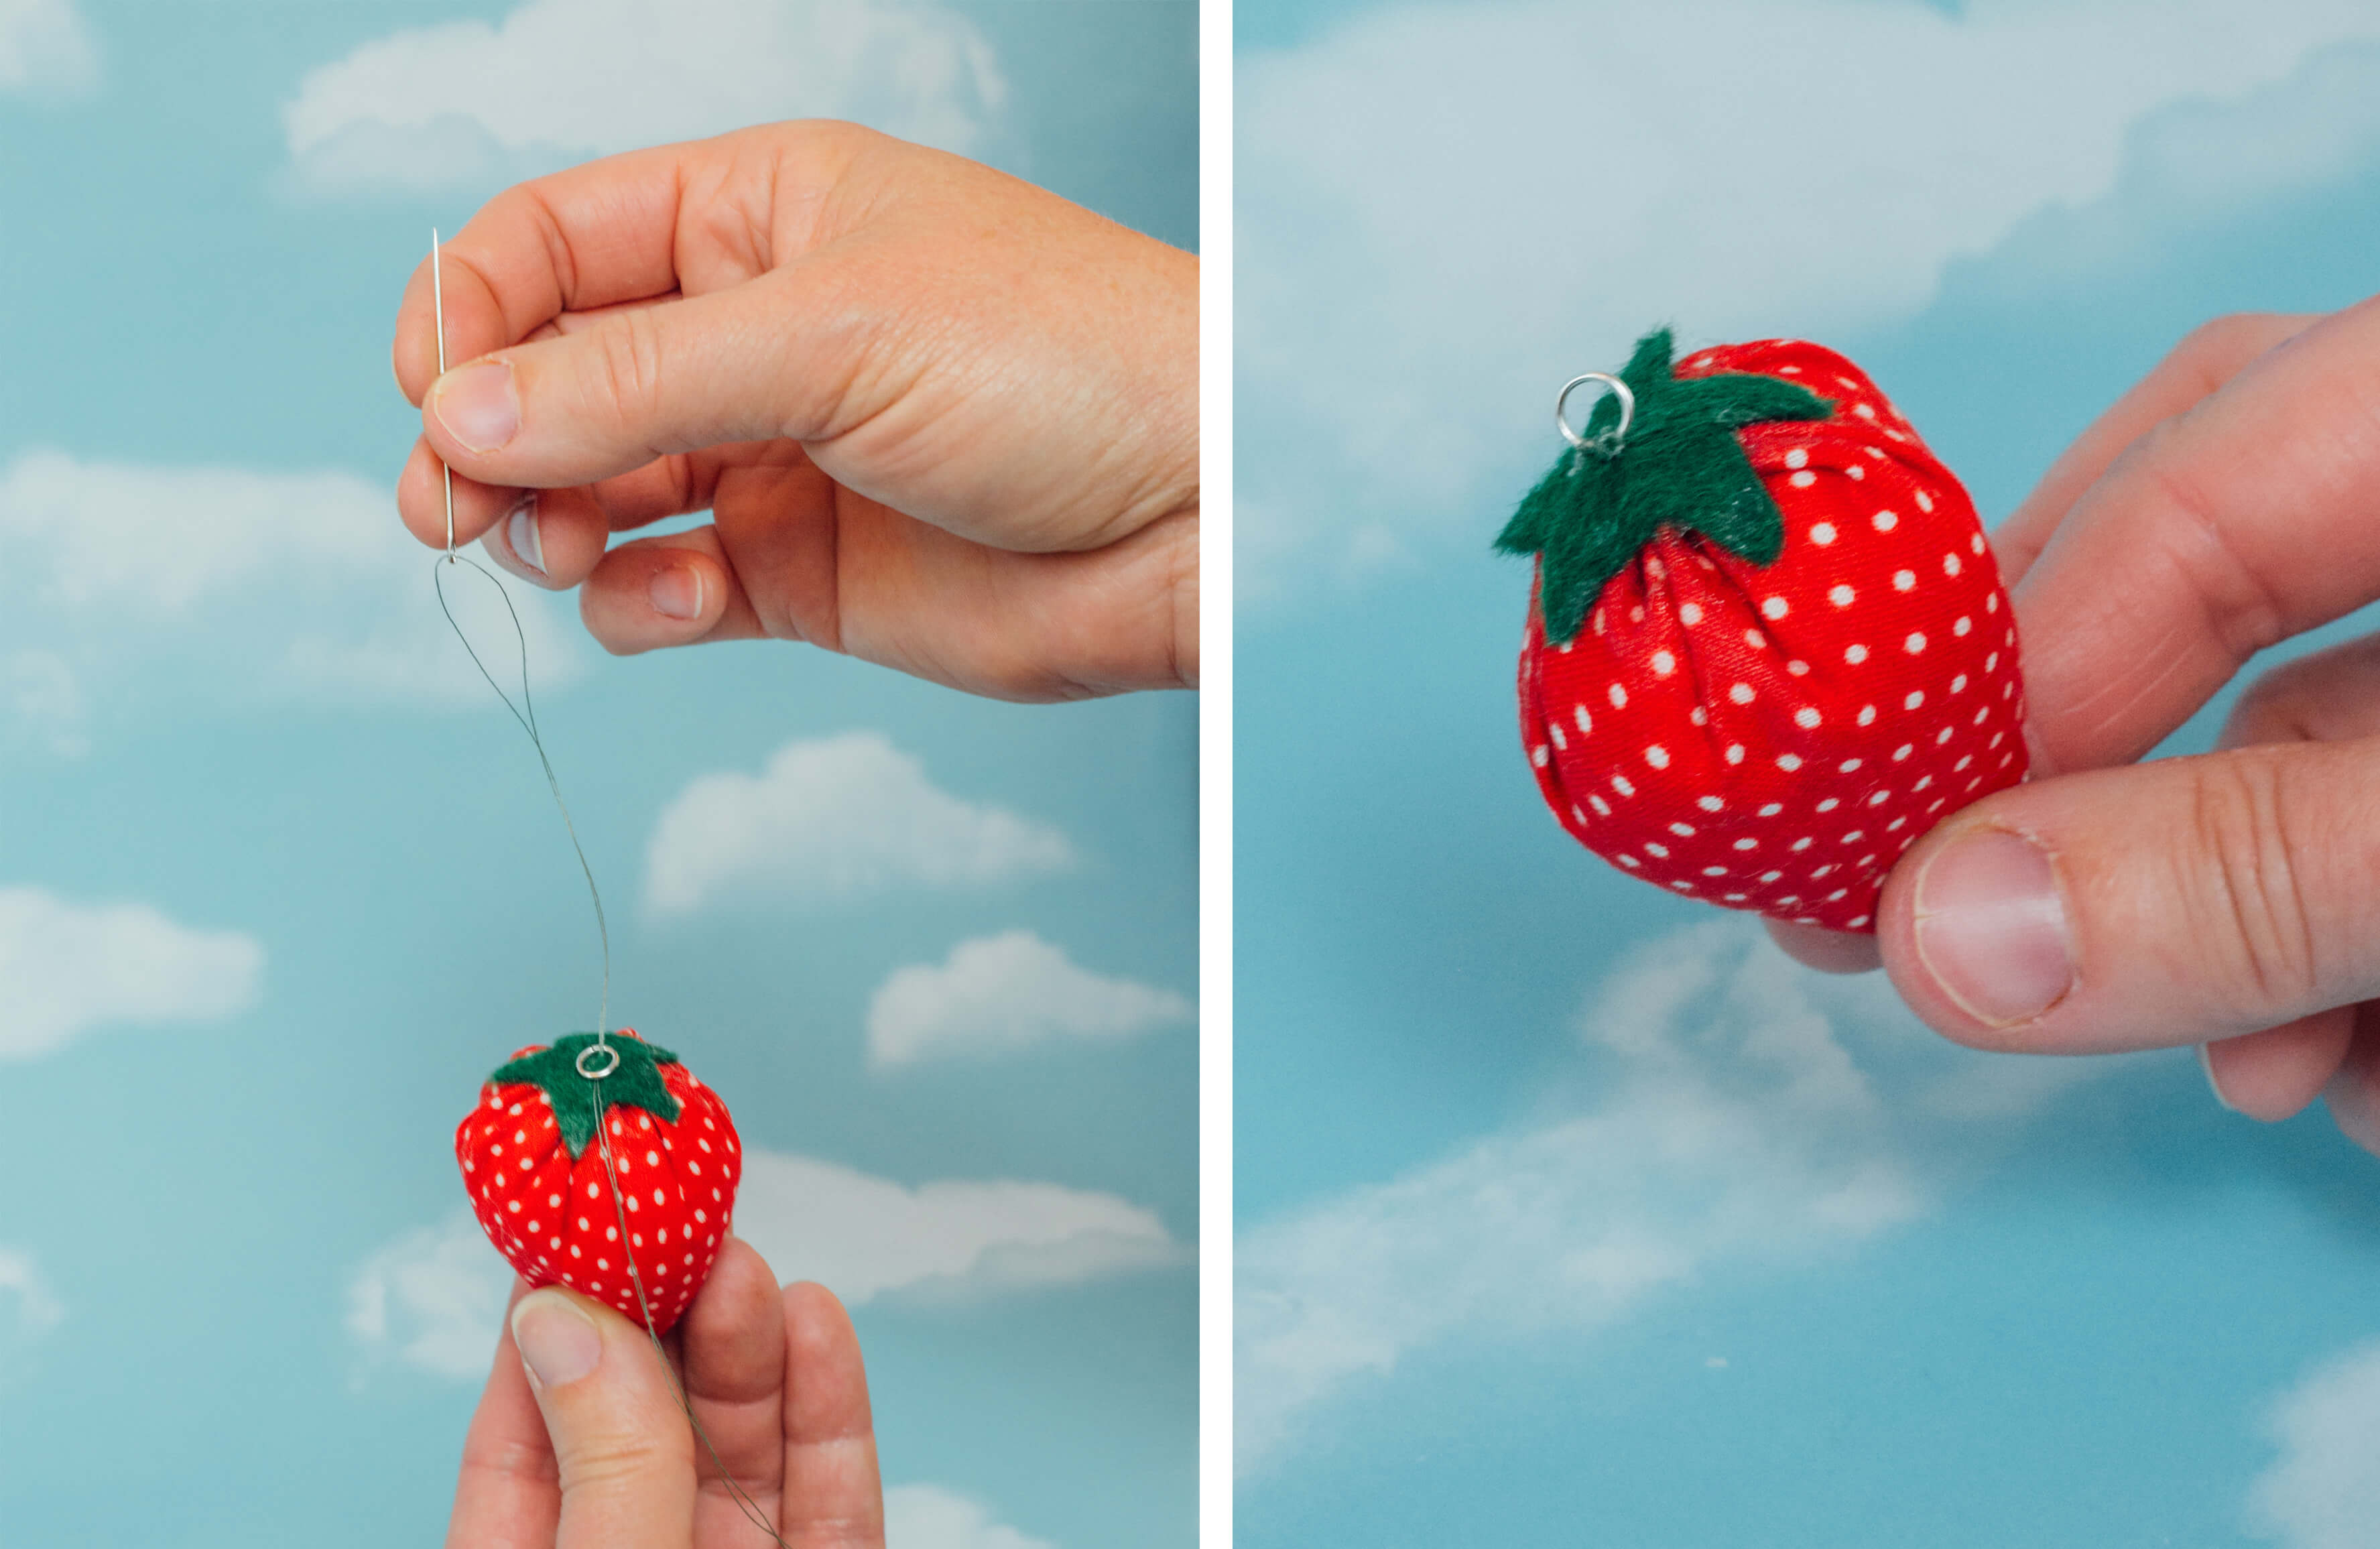
Affixing a jump ring to a fabric or stuffed object ’tis mad easy. All you need to do is place a jump ring onto the object and sew a few loops around it with a needle and thread. Tie a li’l knot when you’re done, and clip the excess thread.
Step Two
Open up the jump ring, slide on an earring hook, and close it back up:

Done and done! Soak up the attention those earrings are about to get. ♦