


HELLO, HAIR.
My love affair with wigs began a couple of years ago after I went scissor-buck and chopped my hair into a mohawk. This spur-of-the-moment decision left me with a pretty cool hairstyle, but not a whole lot of versatility. On many days, I missed the length of my hair and wanted to cover up the awkward stages it went through as I grew it out. I decided that if I wanted my hair to continue to be ever-changing and healthy, my best option would be to start buying wigs.
Even if you are not struggling with transitioning hair or constant identity crises like me, you can still take advantage of how fun and easy a change of hair can be!
It’s truly amazing how much wigs have improved over the last few years. It has become very easy to find a wide variety of styles and colors at all different price points. But first, here’s a brief little primer on wigs just to help point you in the right direction!
There are many different ways in which wigs are constructed. Most wigs have this type of construction and have some sort of bangs, covering up the hairline:

Two of my synthetic wigs.
Other wigs are similar, but have a lace part or hairline to give the illusion that the hair is your own/allow you to wear styles where the hair is pulled away from your face. These are called lace-front wigs:
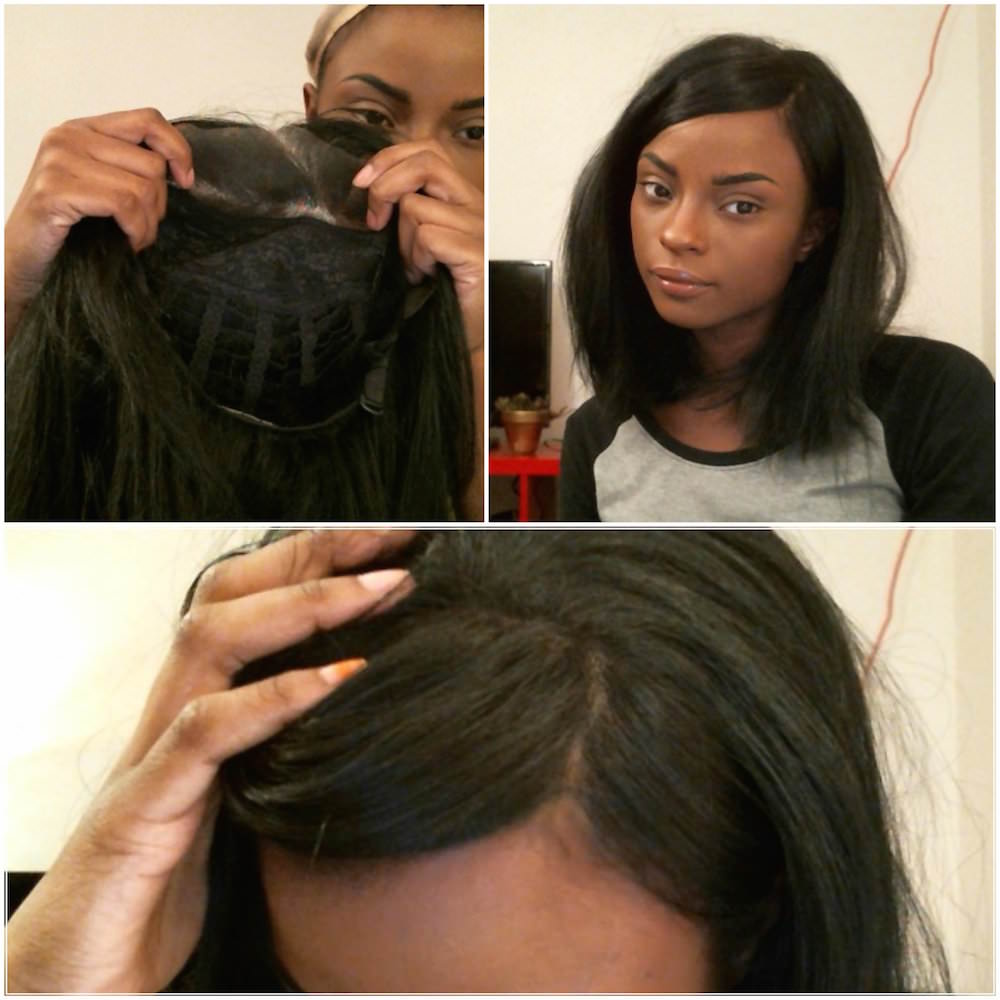
A lace-front wig.
The next important distinction is human hair versus synthetic hair. The short black wig directly above is 100 percent human hair, meaning I can wash, curl, and dye this wig as if it were my own hair. The rest of my wigs are synthetic. They each came with their own care instructions because there are different types of synthetic fibers which all accept heat differently. Most wigs have wash instructions and, often, labels that tell you what temperature you can set your heat tools to curl or flat-iron them. You may also dye synthetic wigs, but they will not accept hair dye. Typically, the best way to color synthetic wigs is with fabric dye, which is often made for synthetic fibers.
Before you put on your new ’do, you’ll want to prepare your hair. There are different ways to prep your hair before wearing a wig, but, for the most part, all you need to do is flatten your hair as much as possible and have a wig cap handy. If you have very short hair or straight hair that lays flat easily, you can simply put the wig cap on over your hair. But if you’re like me, and have a whole lot of kinky and/or curly hair that does not give in so easily, you’re going to want to braid your hair:

Here’s how I do it.
I usually make 4-6 loose braids or cornrows. The more braids you divide your hair into, the smaller they are. And the smaller the braids are, the flatter your hair will lay! If you have a voluminous or bulky wig, it won’t really matter if your hair is lumpy and bumpy, so you can get away with big braids. However, if you have a more sleek and flat wig, you may want to make smaller braids to flatten your hair out more.
As far as shopping for wigs goes, you have a couple of options. You can visit local wig shops and beauty supply stores, which gives you the advantage of being able to try on wigs before buying one. You can also find them online pretty easily. Sites like Gothic Lolita Wigs and Fairywigs are good places to start looking. Personally, I don’t mind ordering less expensive synthetic wigs online, because it’s low-risk. If you’re interested in getting a fancier, high-end wig, I highly suggest researching wig company reviews on YouTube. Best Lace Wigs and DivasWigs are just two websites you can shop, but tons of YouTubers buy hairpieces from countless websites with their own money and do honest reviews on the pieces so the rest of us know whether or not it’s worth it to shell out for a particular wig or wig company.

My “Taylor Swift circa 2011” wig.
I hope this little intro is informative and encourages you to step outside of the box. Just have fun with it! ♦