

I’ve been MEGA obsessed with hanging mobiles and chandeliers as of late. They’re super fun to DIY, and a killer way to decorate your space on a budget! A while back, I found a post at A Beautiful Mess on how to make beautiful and airy paper-flower chandeliers. This DIY is uses theirs as a jumping off point, though I made alterations based on my own personal style and budget. That being said, this project leaves a lot of room for experimentation! Don’t be afraid to stray from these instructions or to do yr own thang.
What you’ll need:

- A metal hoop (aka a macramé ring)—any size works. Mine was about a foot in diameter.
- Lightweight fabric in the color of your choosing
- A ruler or tape measure
- Scissors
- Tacky glue
- String
- Tissue paper in two or more colors
- A needle
- Colored paper
- Straws (I used paper, but plastic works just as well.)
- Washi tape
- Beads
- A pencil
The last thing you’ll need is TIME. These mobiles aren’t overly complicated to make, but they can take a while to finish. I went ahead and broke the instructions into four parts, if you’re looking for good places to take breaks. And don’t worry if you can’t finish everything in one day!
Part One: The Base

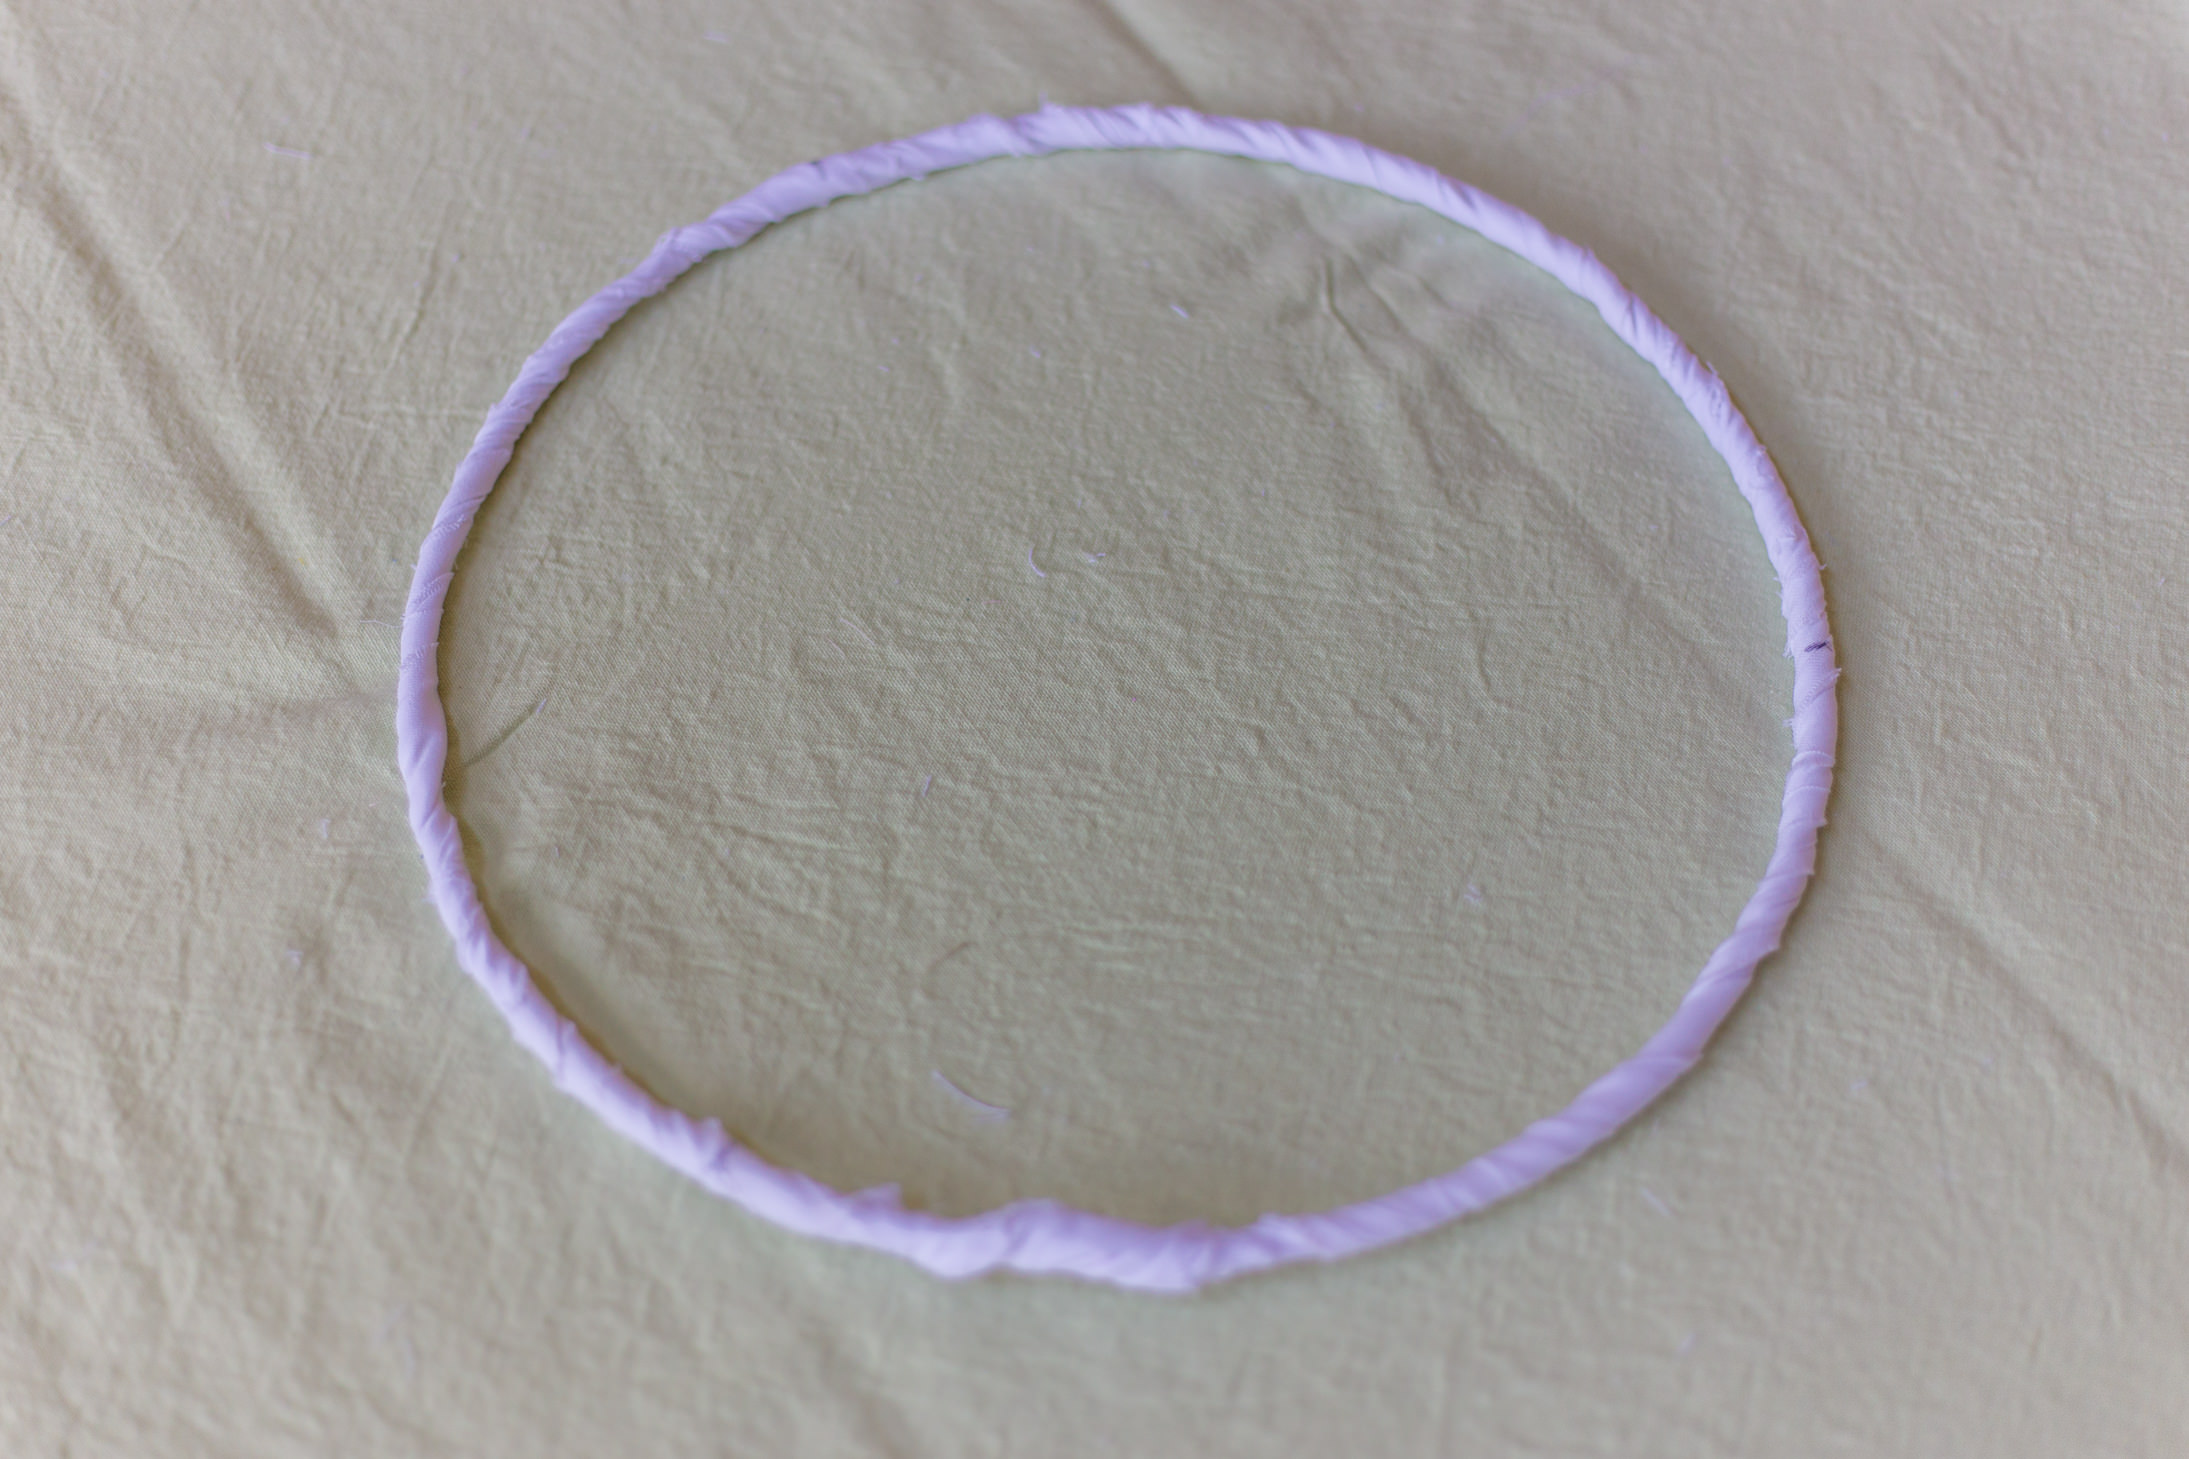
Refer to this photo for Steps One through Three.
Step One
Cut the lightweight fabric into strips that are two inches wide, and about a foot long. The number of strips you’ll need depends on the size of your hoop; cut a couple to start out with, and make more later if you need them.
Step Two
Squeeze a line of tacky glue along a small section of the metal hoop. (If you try to cover the whole thing at once, you’ll get glue all over the place!)
Step Three
Secure a short end of the fabric to the hoop, then start wrapping the fabric around it. Be sure to keep the fabric taut as you wrap. Repeat this step until your entire hoop is wrapped in fabric.
Step Four (Optional)
Using your fingers, apply a layer of tacky glue over the fabric. This will help prevent it from fraying, and will seal it to the hoop more securely.
When you’re done, your hoop should look like this…
Part Two: Suspension Strings
Step One
Your finished chandelier will hang from three strings. Decide how long you want the strings to be (mine were about 32 inches long), then cut three pieces of string at that length.
Step Two
Tie the strings to the metal hoop, equidistant from each other. A ruler or tape measure is helpful for this part!
Step Three
Cut one color of tissue paper into two strips that are one inch wide, and about 20 inches long (20 inches is the length of a standard sheet of tissue paper).
Step Four
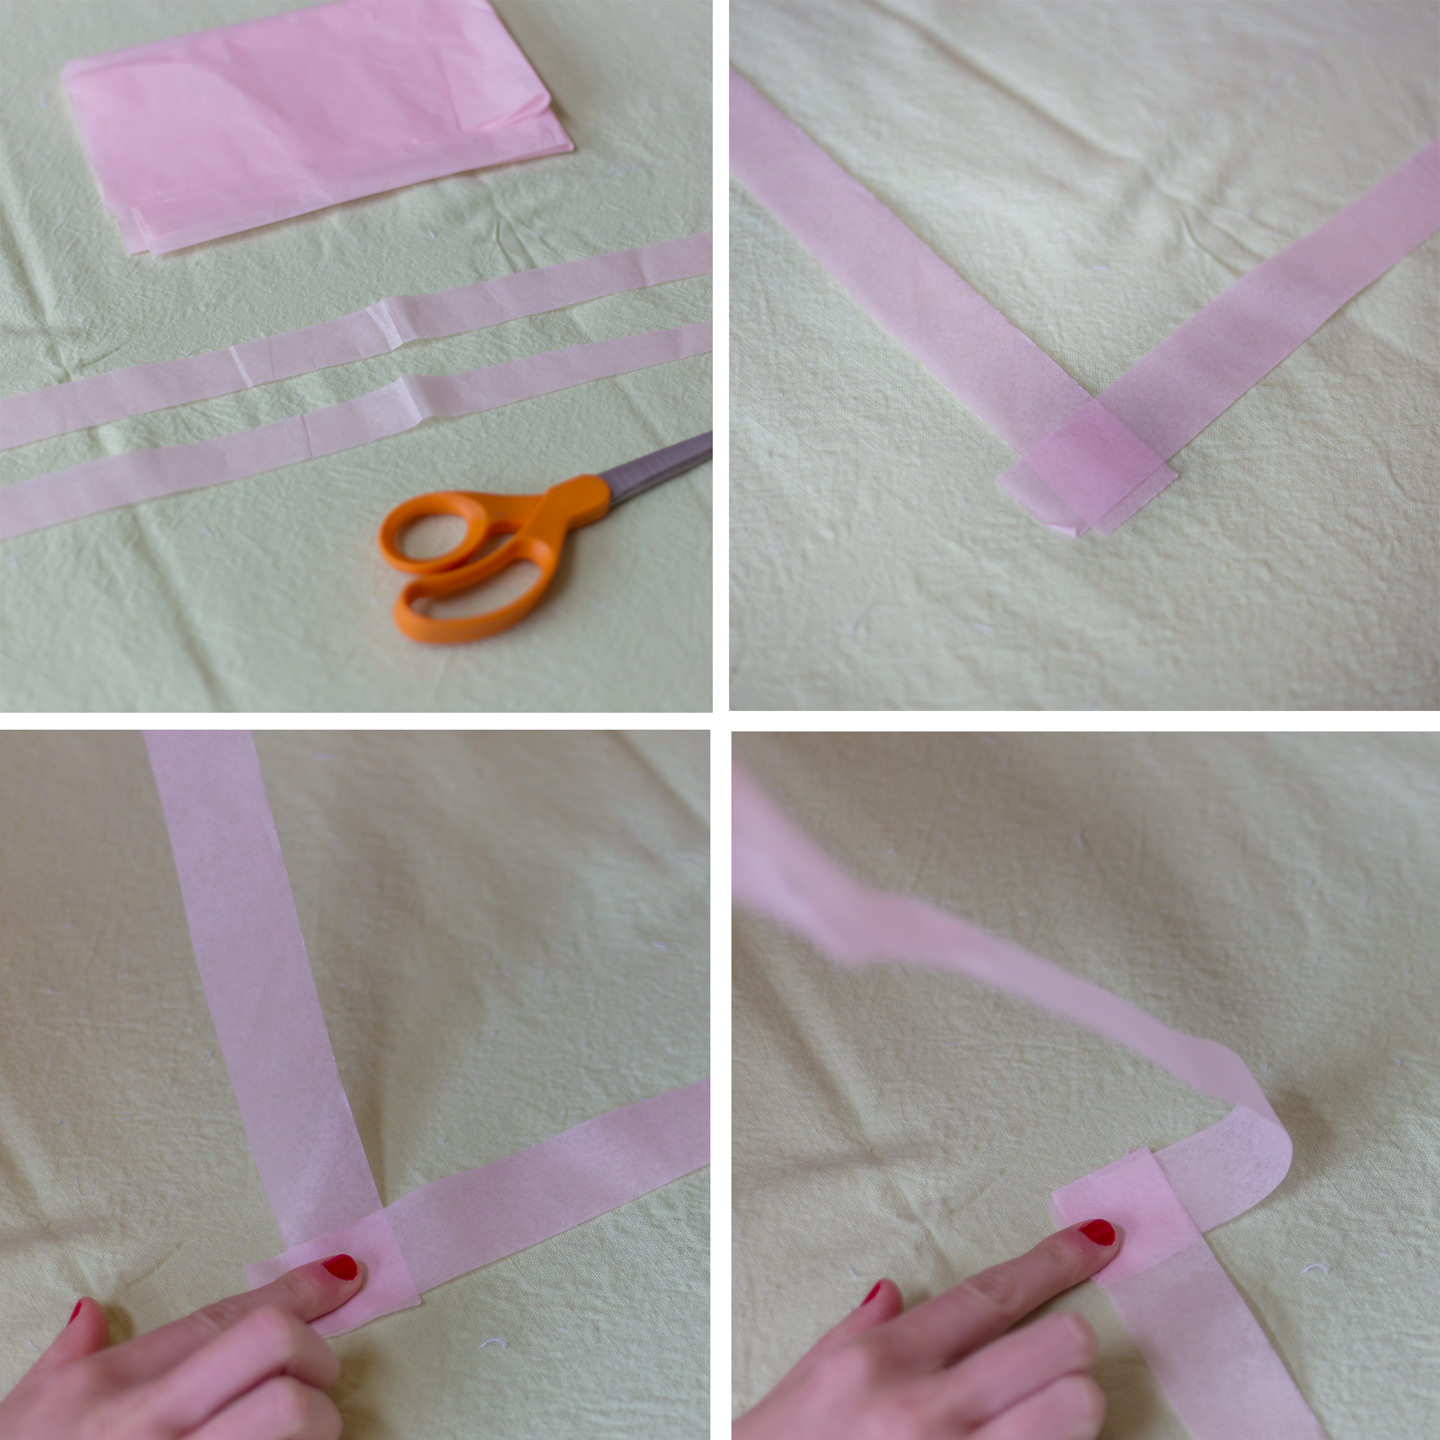
Place the two strips of tissue paper in an L-shape, with their ends overlapping. Fold the bottom strip over the top strip, and press down on the fold. Now fold the top strip over the bottom strip, and press down on that fold. (Really, this is just a fancy accordion fold.) Repeat until you’re left with a folded-up square.
Step Five

Thread the end of one of the strings tied to your hoop through your needle. Poke the needle through the middle of the tissue-paper square, and slide the square through the string. Caaaaarefully stretch the folded square down the length of the string.
Step Six
Repeat Steps Four and Five until all three strings are entirely covered by paper. This can get pretty boring after a bit, so it’s more fun (to me) to do it while watching a movie or some TV.
Step Seven
Tie the ends of all three paper-covered strings together. This is what you should have so far…
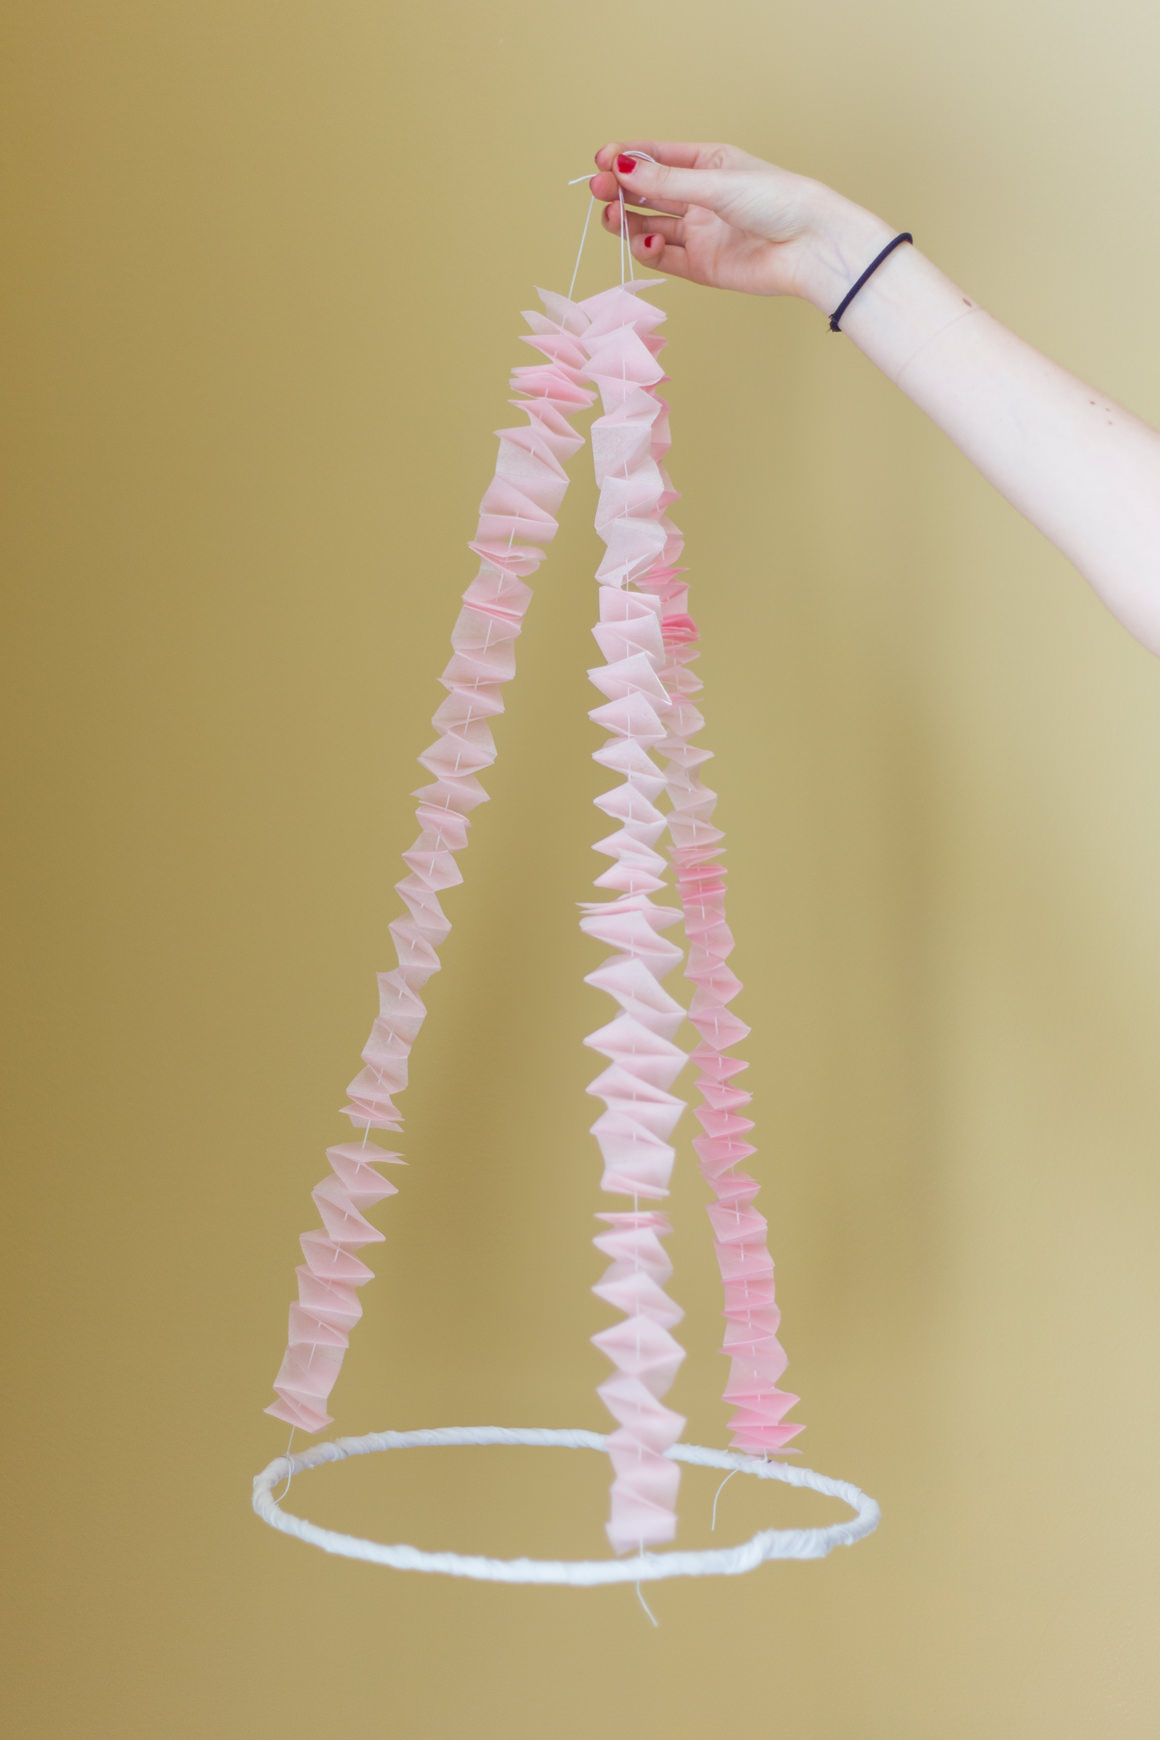
Nice work!