


Marbling is a cool nail-art technique that involves the use of AGUA, which you cover with a layer of nail polish. How does it work? Simple science! The combined ingredients in the nail polish is less dense and lighter in weight than the water, which allows the polish to float on the surface of the water instead of mixing with it—and create a really cool pattern on your nailz. It can be a little tricky to do at first, but it’s really fun and easy once you get the hang of it. Let’s get started!
What you’ll need:

- Two or more nail polishes in whatever colors you like. I noticed that thicker formulas didn’t work for this—you want polishes that are a little runny. In my attempts, Revlon ColorStay was the most successful. I used the colors Passionate Pink and Coastal Surf.
- Nail polish remover.
- A top coat.
- Tape.
- A cup that you don’t mind messing up. I cut a red plastic Solo cup in half for easy nail-dipping.
- Room-temperature filtered water.
- Toothpicks.
- Cotton swabs.
How to do it:

1. Tape up the skin around your nails, being sure sure to cover only your cuticles and skin, and not any of the nail itself.

2. Fill the cup with water, to about the 2/3 mark.
3. Get a LOT of polish on your brush, then drop a blob of it right into the middle of the cup (without letting the brush touch the water). Repeat with all the polishes you’re using, in any order, until they form rings, like in this picture. I did about seven drops, total, but first I had to experiment with different formulations to find ones that looked smooth and spread nicely. It’ll be a trial-and-error process for you, too—just put on Clueless and have fun with it!

4. Drag a smooth line through your potion with a toothpick, from the outside of the circles in.
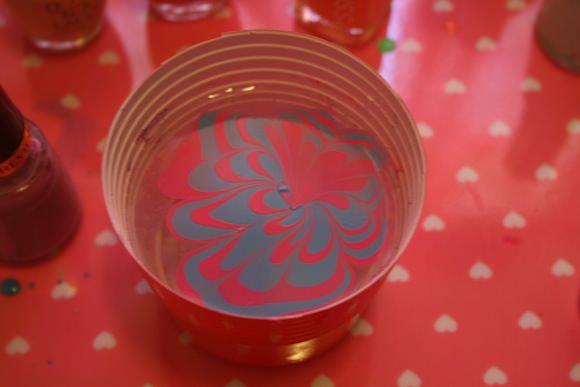
5. Repeat this process to make a design like this one—or whatever looks cool to you. Just play around, and trippy swirls and psychedelic patterns will start to form before your very eyes! Just be sure to wipe your toothpick on a paper towel between strokes.

6. Ooh, now it’s time to DIP! (I promise that what you see under my fingernail in that photo is not the remains of Cheeto dust and is just some dried-up polish from previous trials, OK?!) Find an area in the polish rings that you think has the coolest design and dip a finger into it. Keep it submerged in the water and use one of the cotton swabs to swipe around your nail, twisting it a little as you go. This separates the excess polish from the surface of the water AND from your finger, which prevents your work from getting ruined when you pull it out—otherwise, the whole layer of color would attach to your nail and come up with it. You’ll find that the polish will pick up from the water easily!

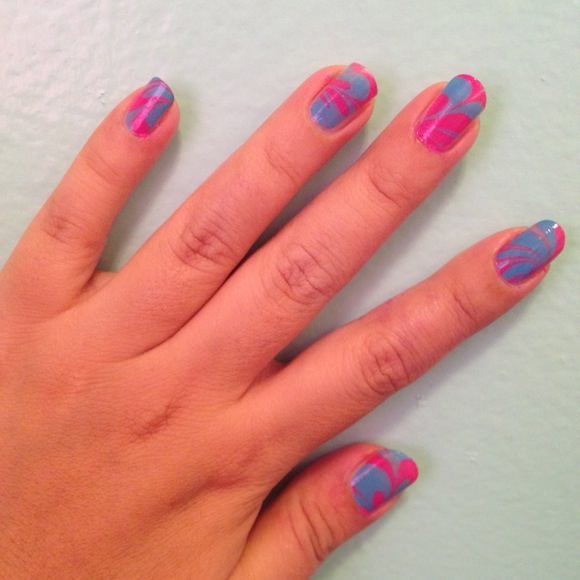
7. Remove your nail from the water. You should see a cool design like this. My finger looks pretty kewl as well. Should I keep it like that, or nah?

8. Carefully remove the tape and admire your artistic talents. Damn, boo, that nail should be in a museum! Now repeat steps two through seven on each finger. Yes, that means dropping the polish in and creating rings for each one. It WILL get messy, but look how cool your fingas are going to look! Plus, no two will ever look the same, like a psychedelic snowflake!
9. Use cotton swabs and nail polish remover to clean excess nail polish around your nails and on your hands. Apply your top coat and you’re done, you BOSS!
Look at those gorgeous nails! Your friends will be so impressed when they ask you what salon you went to and you say, “The cool new salon called THIS GORGEOUS AND TALENTED PERSON STANDING IN FRONT OF U, AKA ME.” ♦